DIY Home Décor: Creative Projects to Spruce Up Your Space
–>Gallery Wall
–>Repurpose Furniture
–>Customized Shelving
–>DIY Planters
–>Fabric Wall Hangings
–>Upcycled Décor
–>Customized Textiles
–>Rustic Signage
–>Statement Lighting
–>Wall Stenciling
* Gallery Wall:
Create a gallery wall with a mix of framed artwork, photographs, and other meaningful items. You can mix and match frames of different styles and sizes for an eclectic look.

Plan Your Layout: Before you start hanging anything, lay out your frames and artwork on the floor to experiment with different arrangements
Choose Your Artwork: Select a mix of artwork, photographs, and other items that reflect your personal style and interests.
Select Frames: Choose frames that complement each other and the overall style of your space. You can go for a cohesive look with matching frames,
Create a focal point: Choose one larger piece or a group of larger pieces to anchor your gallery wall and build around it.
Arrange and Hang: Once you’ve settled on a layout, start hanging your artwork on the wall.
* Repurpose Furniture: Give old furniture a new lease on life by painting it in a fresh color or applying decorative techniques like decoupage or stenciling.

Assess the Piece: Before you begin, assess the condition of the furniture piece. Ensure that it’s sturdy and free from major structural damage.
Choose Your Technique: Decide on the technique you want to use to transform the piece. Painting, decoupage, and stenciling are popular options,
Prep the Surface: If you’re painting the furniture, sand the surface lightly to create a smooth base for the paint to adhere to
Select Your Materials: Choose high-quality paint, decoupage medium, or stencils depending on the technique you’re using.
Painting: Apply a coat of primer to the furniture if needed, then paint the piece in your chosen color.
* DIY Planters: Repurpose old containers like mason jars, tin cans, or wooden crates into stylish planters for your indoor plant.

Gather Your Materials: Collect old containers such as mason jars, tin cans, or wooden crates.
Prepare Your Containers: Clean your containers thoroughly to remove any dirt or residue. If using tin cans, remove any sharp edges by sanding them down or covering them with tape
Drainage: Ensure proper drainage by adding a layer of small rocks or pebbles to the bottom of each container.
Potting Soil: Fill each container with potting soil, leaving enough space at the top for your plants.
Plant Your Greenery: Carefully transplant your indoor plants into the prepared containers, ensuring that they’re positioned securely and surrounded by soil.
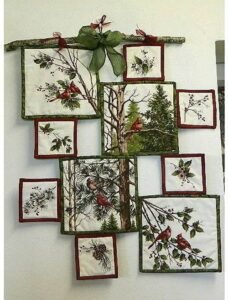
* Fabric Wall Hangings: Create your own fabric wall hangings using fabric scraps, embroidery hoops, and other materials.

Gather Your Materials:
- Fabric scraps in various colors, patterns, and textures
- Embroidery hoops in different sizes
- Scissors
- Needle and thread or a sewing machine
Prepare Your Fabric:
- Select your fabric scraps and cut them into desired shapes and sizes. You can create geometric shapes, abstract designs, or even simple squares or rectangles
Assemble Your Hoops:
- Disassemble the embroidery hoops and separate the inner and outer rings.
- Place the inner ring on a flat surface and lay your fabric over it, ensuring the design is centered and positioned as desired.
Add Embellishments (Optional):
- Get creative with adding embellishments to your fabric wall hangings. You can sew on buttons, beads, or sequins to enhance the design.
Create a Hanging Loop (Optional):
- If you’d like to hang your fabric wall hangings, consider adding a loop for hanging. You can attach a ribbon or fabric strip to the top of the hoop and secure it with glue or stitching.
* Upcycled Décor: Turn old items like wine bottles, jars, or even old doors into decorative pieces by painting them, adding embellishments, or repurposing them in creative ways.

Painted Wine Bottles:
- Clean empty wine bottles and remove any labels.
- Paint the bottles with acrylic or spray paint in your desired colors. You can use solid colors, create ombre effects, or add geometric designs.
Decorative Jars:
- Repurpose glass jars from food items like pasta sauce, pickles, or jam.
- Paint the jars with chalk paint or acrylic paint in colors that complement your décor.
Repurposed Doors:
- Turn old doors into unique furniture pieces such as tables, headboards, or room dividers.
- Sand down the surface of the door to remove any rough spots or imperfections.
Wine Cork Crafts:
- Save wine corks from your empty bottles and repurpose them into a variety of crafts.
- Create a cork bulletin board by gluing corks to a wooden frame or backing board.
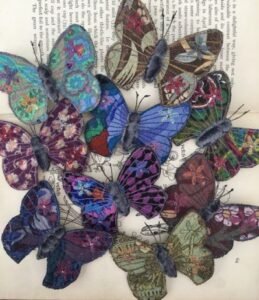
* Customized Textiles: Personalize your space by making your own throw pillows, curtains, or table runners using fabric paint, stencils, or embroidery.

Choose Your Textiles: Select the textiles you want to customize, such as plain throw pillows, curtains, or a table runner.
Select Your Design: Decide on the design or pattern you want to create. You can draw inspiration from existing patterns, nature, or your own imagination
Gather Your Materials:
- Fabric paint or fabric markers in your desired colors
- Stencils (if using)
- Paintbrushes or sponge brushes
Prepare Your Workspace: Lay down a protective surface to prevent paint from getting on other surfaces.
Customize Your Textiles:
- Fabric Painting: Use fabric paint and brushes to paint your design onto the textile. Start with light layers and allow each layer to dry before adding additional details or colors
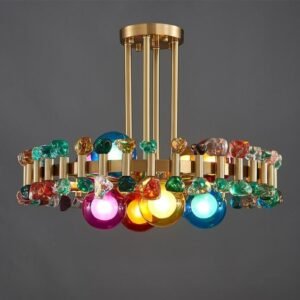
* Statement Lighting: Upgrade your lighting fixtures with DIY options like pendant lights made from mason jars or geometric lampshades made from wire.

Mason Jar Pendant Lights:
- Gather materials: Mason jars, pendant light kits (available at hardware stores), ceiling hooks, wire cutters, and a drill.
- Prepare the mason jars: Drill a hole in the center of each mason jar lid large enough to fit the pendant light socket. Be sure to use a drill bit that matches the size of the socket.
Geometric Wire Lampshade:
- Gather materials: Wire (such as copper or brass), wire cutters, pliers, lamp socket, lamp cord, and a lightbulb.
- Design your lampshade: Sketch out a geometric design for your lampshade. Consider shapes like triangles, hexagons, or squares.
Geometric Wire Lampshade:
- Gather materials: Wire (such as copper or brass), wire cutters, pliers, lamp socket, lamp cord, and a lightbulb.
- Design your lampshade: Sketch out a geometric design for your lampshade. Consider shapes like triangles, hexagons, or squares.
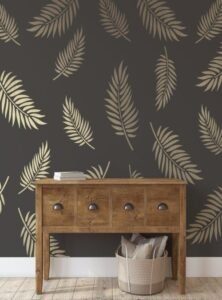
* Wall Stenciling:Add visual interest to your walls with stenciled designs or patterns. You can use stencils to create accent walls or to add subtle details to your existing décor.

Choose Your Stencil: Start by selecting a stencil design that complements your space and fits your desired aesthetic
Prepare Your Wall: Before you begin stenciling, ensure that your wall is clean, smooth, and free of any imperfections.
Position the Stencil: Use painter’s tape to secure the stencil to the wall in your desired location.
Apply Paint: Dip a foam roller or stencil brush into your chosen paint color, then blot off any excess paint onto a paper towel.
Remove the Stencil: Once you’ve finished painting the stencil design, carefully remove the stencil from the wall while the paint is still wet.
* Rustic Signage: Create rustic signs using reclaimed wood and stencils or hand-painted lettering. These signs can feature inspirational quotes, family names, or personalized messages.

Gather Materials:
- Reclaimed wood plank or board (you can find these at salvage yards, thrift stores, or repurpose old wooden pallets)
- Sandpaper or a sander
- Stencils with your chosen lettering or design
Prepare the Wood:
- If your reclaimed wood is rough or has imperfections, sand it down until it’s smooth to the touch. You can use sandpaper or a sander for this step.
Design Your Sign:
- Decide on the size and shape of your sign. You can keep it simple with a rectangular plank or get creative with different shapes.
Apply the Lettering or Design:
- If using stencils, secure them to the wood with painter’s tape to prevent shifting.
- Use a foam brush or paintbrush to apply paint evenly over the stencil openings. Be careful not to use too much paint to avoid bleeding.
Distress the Wood (Optional):
- For a more weathered and rustic look, you can distress the wood by lightly sanding the edges and surface to reveal the natural wood grain underneath the paint.
*Statement Lighting: Creative Projects to Spruce Up Your Space” refers to a concept that combines the trend of statement lighting with do-it-yourself (DIY) home décor projects aimed at enhancing the ambiance and aesthetics of living spaces.

Statement Lighting: Statement lighting refers to light fixtures or installations that serve as focal points in a room. These fixtures are often unique, eye-catching, and designed to make a bold statement. Examples include chandeliers, pendant lights, and sculptural lamps.
DIY Home Décor: DIY home décor involves creating or customizing decorative items and furnishings for your home using your creativity and craftsmanship. DIY projects can range from simple crafts to more complex woodworking or upholstery projects.
Combining the Two: “Statement Lighting DIY Home Décor” suggests integrating statement lighting elements into your DIY home décor projects. This could involve creating custom light fixtures, refurbishing existing ones, or incorporating lighting elements into other DIY projects, such as wall art or furniture pieces.
Creative Projects: The term “creative projects” implies a variety of imaginative and innovative endeavors. In the context of statement lighting DIY home décor, this might involve experimenting with different materials, styles, and techniques to craft one-of-a-kind lighting fixtures or decorative elements.
*Wall Stenciling: Creative Projects to Spruce Up Your Space” encompasses the concept of using stencils to enhance walls as part of do-it-yourself (DIY) home decoration endeavors. Here’s how you can interpret and apply this concept.
- Creating Custom Stencil Designs: Designing and cutting custom stencil patterns using specialized tools or stencil-making kits. These designs can range from intricate geometric patterns and nature-inspired motifs to whimsical shapes and symbols.
- Applying Stencil Designs: Using paint, spray paint, or specialty wall finishes to apply stencil designs onto walls. Experimenting with different color combinations, paint techniques, and stencil placements to achieve desired visual effects and create eye-catching focal points.
- Mixing and Matching Stencils: Combining multiple stencil designs to create layered or intricate patterns that add depth and dimension to walls. Mixing stencil sizes, shapes, and styles to create visually dynamic and cohesive wall treatments that complement existing décor.
- Adding Personal Touches: Incorporating personalized elements such as initials, quotes, or meaningful symbols into stencil designs to add a touch of individuality and sentimentality to wall decorations. Customizing stencil patterns to reflect personal interests, hobbies, or themes that resonate with homeowners.
Few more interesting topics click here Interesting topics

1 thought on “DIY Home Décor: Creative Projects to Spruce Up Your Space”